Effortless Oreo Balls: Just 3 Ingredients for No-Bake Bliss
Imagine a decadent, melt-in-your-mouth chocolate truffle, but with the unmistakable, beloved flavor of your favorite cookie. Now, imagine achieving this dessert nirvana with just three simple ingredients and absolutely no baking required. Welcome to the wonderful world of Oreo Balls – the ultimate shortcut to dessert heaven that promises pure bliss with minimal effort. This phenomenal
oreo balls recipe isn't just easy; it's a game-changer for anyone craving a spectacular treat without the fuss of a hot oven or complex techniques. Whether you're a seasoned baker looking for a quick win or a complete novice stepping into the kitchen, these delightful spheres of joy are guaranteed to become a cherished addition to your repertoire.
The Allure of Effortless Dessert: Why Oreo Balls Reign Supreme
In a world often filled with demanding schedules and endless to-do lists, the idea of a simple, no-fuss dessert holds immense appeal. This is precisely where the legendary Oreo ball steps in, offering a unique blend of convenience and indulgence. Unlike elaborate cakes or delicate pastries that require precise measurements and careful oven monitoring, the
oreo balls recipe is incredibly forgiving and delivers show-stopping results every time.
The "no-bake" aspect is perhaps its greatest strength, making it an ideal candidate for sweltering summer days when turning on the oven is unthinkable, or during the notoriously busy holiday season when kitchen space (and patience) can be in short supply. You get to bypass the baking anxiety, the fear of sunken cakes, or overcooked cookies. Instead, you're treated to a delightful, truffle-like texture that's both rich and satisfying, reminding you of a gourmet confection without the gourmet price tag or effort.
Beyond their ease, Oreo balls are universally adored. Who doesn't love an Oreo? By transforming this iconic cookie into a sophisticated yet playful treat, you're crafting a dessert that appeals to all ages and palates. They're perfect for impromptu gatherings, school bake sales, potlucks, or simply as a comforting treat for yourself and your loved ones. Their versatility and crowd-pleasing nature make them a true dessert sensation, often being the first item to disappear from any dessert platter. When you need a guaranteed hit that’s both impressive and incredibly simple to make, this
oreo balls recipe is your secret weapon.
Unveiling the Magical Trio: Your 3 Essential Ingredients
The beauty of this
oreo balls recipe lies in its elegant simplicity, relying on the perfect synergy of just three readily available ingredients. Each component plays a crucial role in creating the irresistible texture and flavor that makes these treats so addictive.
*
Oreo Cookies: The Star of the Show
It all begins with the classic Oreo cookie – the crisp chocolate wafers embracing a sweet, creamy filling. For this recipe, you'll want to use the *entire* cookie, white filling and all. This ensures that signature Oreo flavor permeates every bite, providing both the chocolatey base and a hint of the iconic creaminess. While the original Oreos are a timeless choice, don't be afraid to experiment with other flavors once you've mastered the basic technique. Mint, peanut butter, or even golden Oreos can open up a world of delightful variations for your no-bake truffles.
*
Cream Cheese: The Silky Binder
The unsung hero of the Oreo ball is cream cheese. This rich, tangy dairy product acts as the perfect binder, transforming the crushed cookies into a pliable, truffle-like dough. It also adds a subtle tang that beautifully balances the sweetness of the Oreos and chocolate coating, preventing the dessert from being overly cloying. For the best results, always opt for *full-fat cream cheese* and ensure it's brought to *room temperature* before mixing. Cold cream cheese will be stiff and difficult to incorporate evenly, leading to a lumpy mixture. Softened cream cheese, on the other hand, will blend seamlessly, creating a smooth and uniform base for your balls.
*
Melting Chocolate: The Luxurious Coating
The final touch is a generous coating of melted chocolate, encasing the creamy Oreo interior in a crisp, shiny shell. While you might be tempted to reach for standard chocolate chips, it's highly recommended to use *candy melts*, *chocolate melting wafers*, or *good quality almond bark*. These products are specifically formulated to melt smoothly, providing a thin, even coating that hardens beautifully and doesn't seize or become too thick. If you prefer using baking chocolate bars (milk, dark, or white), choose high-quality varieties and chop them finely for easier melting. Avoid standard chocolate chips, as they contain stabilizers that can make them difficult to melt into the ideal dipping consistency. The type of chocolate you choose here will significantly impact the final taste and texture, so pick one you truly enjoy!
Your Journey to Oreo Ball Bliss: A Step-by-Step Guide
Creating these irresistible Oreo balls is surprisingly straightforward. Follow these steps for perfect results every time, transforming your three ingredients into dazzling no-bake treats.
- Crush the Oreos to Fine Crumbs: The first and crucial step is to pulverize your Oreo cookies. The easiest and most efficient way to achieve this is by using a food processor. Place the entire cookies (filling included) into the processor and pulse until you have very fine, uniform crumbs. Ensure there are absolutely no large chunks remaining, as these will disrupt the smooth texture of your truffles. If you don't have a food processor, you can place the cookies in a large, sturdy Ziploc bag, seal it tightly, and crush them with a rolling pin or the bottom of a heavy pan until they reach a fine consistency.
- Combine with Softened Cream Cheese: Transfer your finely crushed Oreo crumbs to a large mixing bowl. Add the softened, room-temperature cream cheese. Using a stand mixer with a paddle attachment, a hand mixer, or even a sturdy spatula and some elbow grease, mix the crumbs and cream cheese together until thoroughly combined. The mixture should form a thick, cohesive "dough" that is sticky but holds its shape well. Scrape down the sides of the bowl periodically to ensure even mixing.
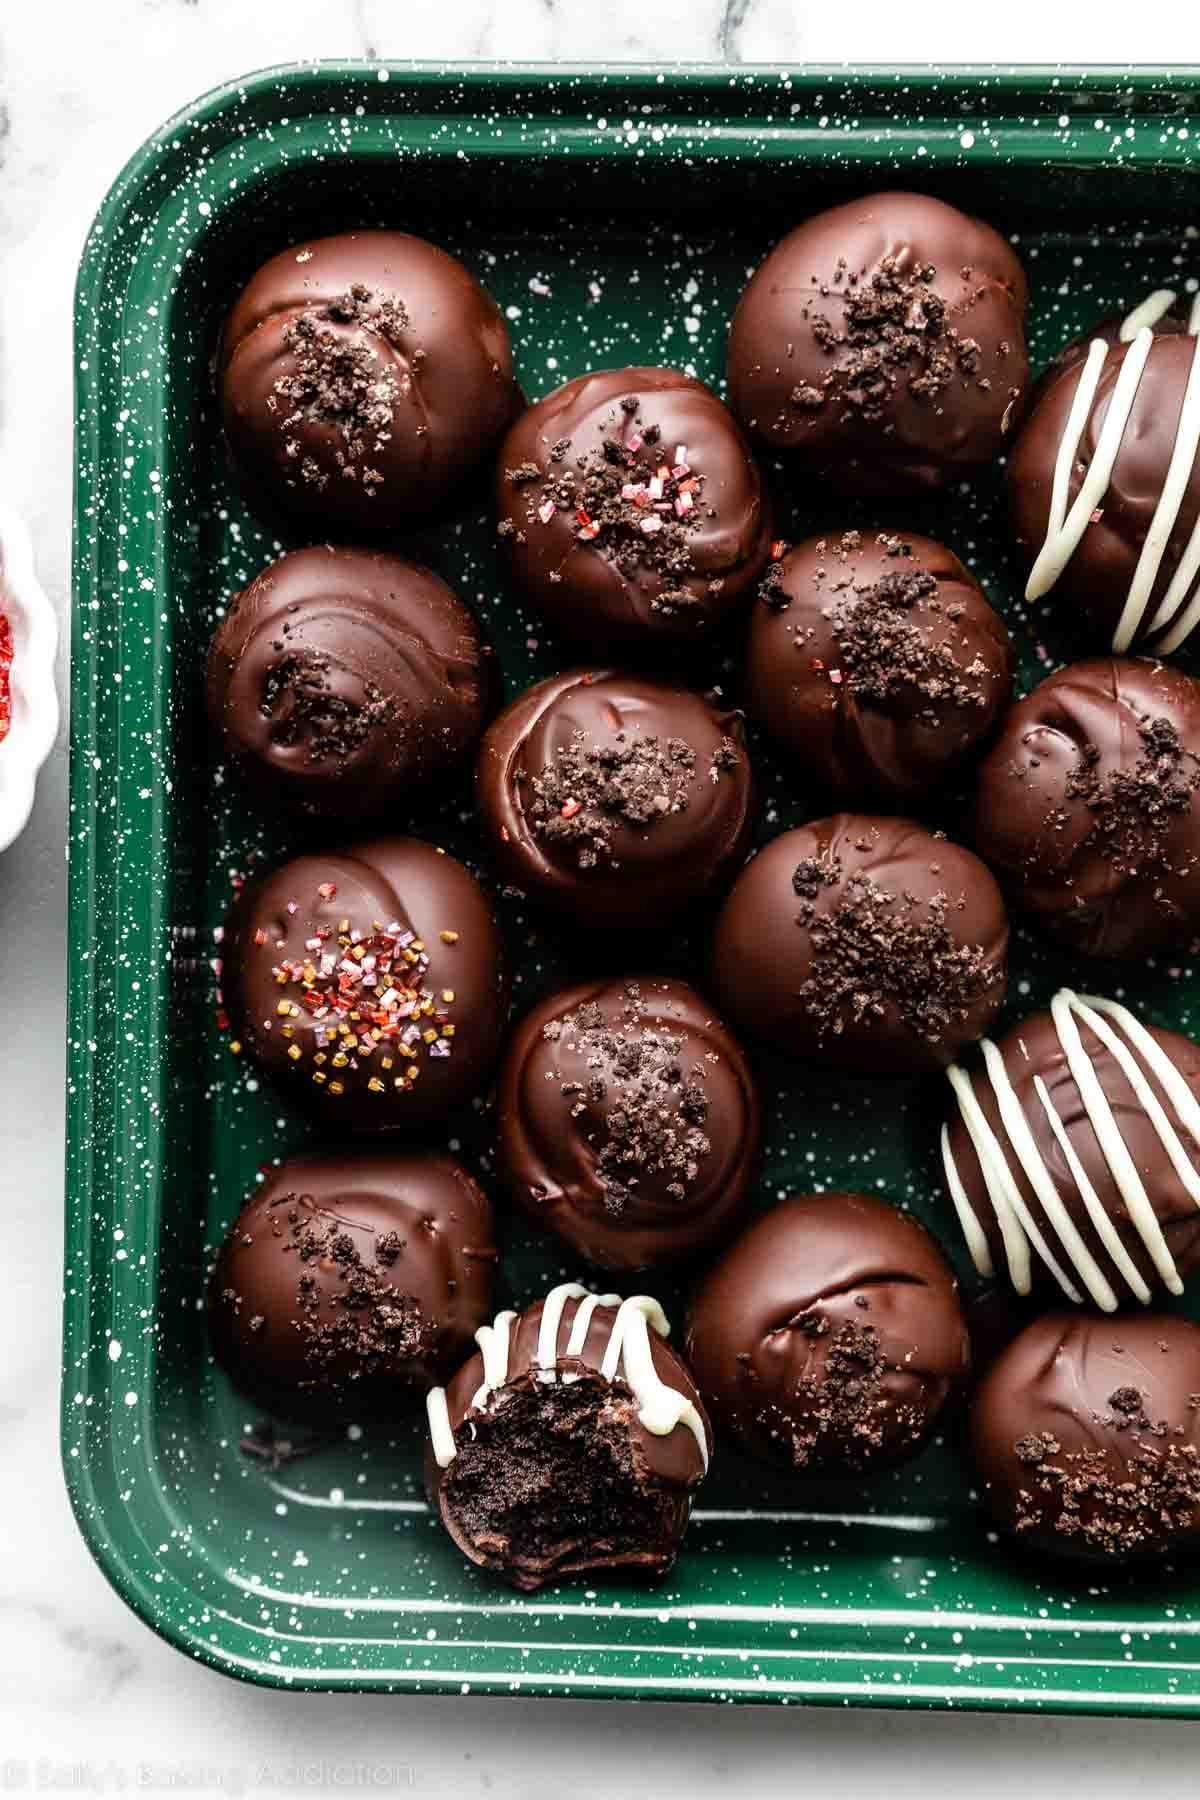
- Roll into Perfect Spheres and Chill: Once your mixture is ready, it's time to roll. Scoop out small portions (about 1-inch in diameter, or roughly the size of a tablespoon) and roll them between the palms of your hands to form smooth, uniform balls. The more consistent the size, the more evenly they will dip and present. Place the rolled balls on a baking sheet or tray lined with parchment paper or wax paper. This prevents sticking and makes transfer easy. This next step is absolutely critical: once all the balls are rolled, place the entire tray into the freezer for at least 15-20 minutes. This quick chill will firm up the Oreo balls, making them much easier to dip in chocolate without falling apart and ensuring a smooth, even coating.
- The Decadent Chocolate Dip: While your Oreo balls are chilling, prepare your chocolate coating. Place your candy melts, melting wafers, or finely chopped chocolate in a microwave-safe bowl. Heat in the microwave in 30-second intervals, stirring well after each interval, until the chocolate is smooth and completely melted. Alternatively, you can use a double boiler on the stovetop. Be careful not to overheat the chocolate, as this can cause it to seize or burn.
- Dip and Coat: Remove the chilled Oreo balls from the freezer. Using a fork or a candy dipping tool, gently drop one ball into the melted chocolate, ensuring it's completely submerged. Lift the ball out with the fork, tapping it gently against the side of the bowl to allow any excess chocolate to drip off. This creates a neat, even coating. Return the dipped Oreo ball to the lined baking sheet.
- Elevate with Decorations (Optional): While the chocolate is still wet, this is your chance to get creative! Sprinkle the tops with extra crushed Oreos, festive sprinkles, a pinch of flaky sea salt, crushed peppermint candy, or even a drizzle of contrasting white chocolate. Or, leave them plain for a classic, elegant look.
- The Final Chill: Once all your Oreo balls are dipped and decorated, return the baking sheet to the refrigerator. Allow them to chill for at least one hour, or until the chocolate coating is completely set and firm. This step is essential for the best texture and presentation.
Expert Tips for Impeccable Oreo Truffles
- Cream Cheese Temperature is Key: We can’t stress this enough! Cold cream cheese leads to a lumpy, uneven mixture. Plan ahead and let it sit out for at least an hour.
- Don't Rush the Chilling: The freezer chill before dipping is non-negotiable. It firms the balls so they don't crumble in the warm chocolate. The final refrigeration ensures the chocolate sets hard and the balls maintain their shape.
- Chocolate Matters: For the smoothest, most professional finish, invest in quality melting chocolate or candy melts. This will save you frustration and yield better results than regular chocolate chips.
- Work in Batches: If you're making a large quantity, keep some of the rolled Oreo balls in the freezer while you dip others. This ensures they stay firm and easy to handle.
- Clean Dipping Technique: A fork is usually sufficient, but a dedicated candy dipping tool can make the process even cleaner. Wiping excess chocolate off the bottom of the fork on the edge of the bowl will prevent puddles. For more advanced techniques and creative dipping ideas, check out Mastering Oreo Balls: Pro Tips for Perfect No-Bake Truffles.
Beyond the Basics: Customizing Your Oreo Ball Creations
While the classic
oreo balls recipe is undeniably perfect, its simplicity also makes it a fantastic canvas for creative customization. Once you've mastered the basic technique, feel free to unleash your inner dessert artist!
*
Flavorful Oreo Swaps: Experiment with different Oreo varieties. Mint Oreos with dark chocolate coating are a refreshing delight, peanut butter Oreos offer a nutty twist, and Golden Oreos can be paired with white chocolate for a vanilla-centric treat.
*
Infuse with Extracts: Add a tiny dash (1/2 teaspoon) of vanilla, almond, peppermint, or even orange extract to your cream cheese mixture for an extra layer of flavor complexity.
*
Diverse Coatings: Beyond milk, dark, and white chocolate, consider using colored candy melts for festive occasions. You can also drizzle contrasting chocolate over the set coating for a visually appealing finish.
*
Get Creative with Toppings: The possibilities are endless! Think mini chocolate chips, toasted coconut flakes, finely chopped nuts (pecans, walnuts, pistachios), edible glitter, mini marshmallows, or even a sprinkle of sea salt to enhance the chocolate's richness.
Storage and Make-Ahead Magic
One of the many benefits of this no-bake
oreo balls recipe is its excellent make-ahead potential and storage longevity, making it perfect for planning parties or preparing gifts.
*
Refrigeration is Key: Always store your finished Oreo balls in an airtight container in the refrigerator. This is crucial for maintaining their firm texture and preventing the chocolate coating from softening. Left on the counter, they will become too soft and messy. They will keep beautifully in the fridge for up to 3 weeks.
*
Freezing for Longer Enjoyment: For extended storage, Oreo balls freeze exceptionally well. Arrange them in a single layer in an airtight freezer-safe container, separating layers with parchment or wax paper to prevent sticking. They can be frozen for up to 2 months. When you're ready to enjoy them, simply transfer them to the refrigerator to thaw for a few hours. This makes them ideal for preparing well in advance for holidays or unexpected guests. If you're planning a large batch for a big event, discover more practical strategies by reading
Crowd-Pleasing Oreo Balls: The 3-Ingredient Party Sensation.
In conclusion, the
oreo balls recipe is more than just a dessert; it's a testament to the joy of simplicity. With just three ingredients – crushed Oreo cookies, softened cream cheese, and melted chocolate – you can create a truly decadent, no-bake treat that rivals any gourmet confection. Whether you're a seasoned dessert enthusiast or a kitchen novice, these effortless delights offer a satisfyingly rich, truffle-like experience that's perfect for any occasion, from casual family nights to elegant holiday parties. So go ahead, gather your ingredients, and prepare to indulge in the blissful ease and unforgettable flavor of these irresistible Oreo balls. Your taste buds (and your busy schedule) will thank you!